Battle Report Quarte Brase
June 16th 1815
The battle was fought using DBN rules (Using arrtition variant). The figures are 20mm Airfix and Irregular Minatures. Giving each army 14 elements
I set out the battle field on a 4'x4' board. For terrain layout I used the scenario book from Richard Borg's Command and Colours Napoleonics.
I included the stream and bridge for visual effect only as it was fordable and no hinderance to either army.
I did not include the tall rye fields as they affected each side equally.
For Initial set up I allowed the Allies 4 elements of Dutch/Belgian/Brunswick troops 2 x Infantry on the ridge in front of the village of Quarte Brae, a Light Infantry unit in Bossu Wood. 1 x Element of Light Cavalry to the rear of the ridge. "Slender Billy" or Prince of Orange was with the Infantry on the Hill.
French initial set up was 1X Element of Foot Artillery on the opposite ridge with 2 x elements of Fusileers and an element of Light Horse to the left flank. Reinforcements of 2 x Light Infantry were already approaching on table. Marshall Ney was just to the rear of the french ridge.
To start the allies were commanded by the prince of Orange. 1 was minused from his pip rolls. Each turn each side threw 1 extra D6. A 4,5,6 meant 1 or 2 elements of reinforcements have arrived. Dicing for which. This meant Commanders never knew who was arriving or when. Reinforcements could include Wellington. When he arrives he takes command and adds 1 to his pip rolls. Ney uses normal pip rolls throughout.
I played the battle using my Solo system. I took the Allies and the system played as Ney. The battle being lost if the army lost 6 elements. For the French to win they also had to secure Quarte Brae.
Allies started and immediatly recieved some Light infantry reinforcements. Billy realised his Infantry were exposed on top of the ridge and moved them onto the opposite slope.
The French formed infantry and advanced off the ridge towards the Dutch/Belgian Troops.
French Light Infantry arrived and headed towards the woods. In subsequent turns More British reinforcements arrived and on turn 5 Wellington came to the field.
Meanwhile the French artillery had re positioned and opened up on the Allies Light infantry causing casualties and forcing them back into the wood. They then target the Royal Horse Artillery and caused enough damage to remove them from the battle.
British reinforcements arrived steadly and Wellington fed them into the line where they were needed most. The British Guards he sent to plug the gap between Bossu Wood and the ridge which the French Light infantry Artillery and cavalry were threatening.
95th Rifles moved into the woods and skirmished for the guards units.
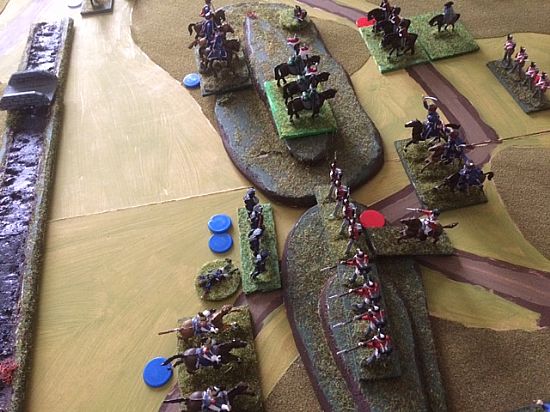
About this time Kellermann brought his heavy cavalry to the field and began to threaten the British left flank. Wellington ordered the Hussars to the left of the ridge to counter this.The french infantry now assaulted the Dutch/Belgians on the ridge and were heavily repulsed causing the French to retreat their infantry.
The French light infantry now advanced on Bossu Wood and Faced the allied Light infantry, Guards and rifles. They were badly maulled by musket fire. The Guards +1 causing damage.
The French now launched there light cavalry consisiting of hussars and Lancers at the Allies on the ridge the only Unit able to meet them was the British Heavy Dragoons. Wellington himself supported them and after a desperate Melee managed to repulse the light cavalry men.
By now Marshal Ney's poor pip rolls was begining to tell as was his appalling reinforcement roles. A unit of Volitigues arrived but they were the last and never saw any action. Two elements of Imperial Guard failed to turn up at all.
On the allies left the Dutch Belgian Infantry squares drove back Kellermanns heavy cavalry and while they were in dissary the British Hussars pounced on what was left of them with devestating effect.
Another French Infantry column advanced over the bridge and and approached the allies right flank but they were forced into line due to musket and rifle fire from their left by the guards and 95th rifles. Wellington accompanied the British heavy dragoons in an effort to throw the French light horse off the ridge. This gave the Allies their victory but in the moment of truimph the Heavy Dragoons were broken by French lancers and Wellington was seriously injured.
So the re fight of Quarte Brae turned out an Allied Victory. Arrival of the French Guardsmen would have been a real threat. As it was they were unused so alot of the french army was in fact still intact.
Marshall Ney was certainly not his usual dashing self at this battle. His low pip rolls actually reflected his lack of drive on the 16th June 1815. Also if he had perhaps led one of the Cavalry charges personally that may have made a difference, especially with the Heavy Cavalry.
If Wellington is unable to take command in 2 days time at Waterloo due to his injuries then this could be a big problem for the Allied forces.
I really enjoyed playing this wargame. The worry about reinforcements, both your own and the enemys made for an interesting game.
I based my set up etc on the account of Quartre Brae written by Bernard Cornwell in his fantastic non fiction book "Waterloo".
DBN was a fantastic set of rules for this battle. It playing out in about 1 1/2 hours.
I hope my historical inaccuracies in troop types and planning will be forgiven.