
Powering up the La Pavoni
UPDATE
240v bolt-in heating elements back in stock -price £24 plus postage. Please note the new elements will now fit into the original element position and it is not necessary to weld the holes, simply drill out a 10mm clearance hole for an M10 thread
boiler exchange service for Rancilio Silvia
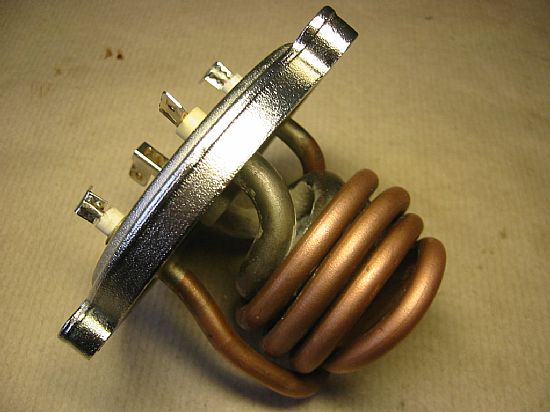
The ultimate disaster is a failed heating element after running the boiler dry or simply the element burning out.
First remove the dead element

Pull out the terminals and then drill out the holes to remove the remains of the welded-in element, a 10mm drill will allow the threaded portion of the element to be inserted


Note the following step is not necessary on the elements I now supply
If your element thread is any larger then an M10 or your nuts are larger than 13mm AF, weld up the holes as these will be too close to the edge to use. Drill offset holes avoiding the large pressure-stat pipe nut and the thermal cut- out bolt (you still have to get a nut on the ends of the element, make sure there is enough clearance before drilling).

Assemble the element and pressure-stat pipe into the plate and into the base of the boiler (with a new boiler/element seal).
It can also be done with the older single element brass bases, (careful not to cut into the smaller element).

I have been successful with the new stock of custom elements to repair double elements fairly easily but it takes more time to adjust the element to fit round the smaller element. (these double elements are getting on for GBP100 as a spare part and the very early "screw-on" type is simply not available), This is the only cost effective way to repair the screw on type element base
The process of reshaping the coil is the problem and getting the threaded terminations to sit flat and in the same plane, if not the rubber seals are not compressed equally all the way round and leakage could occur. Note do take care not the damage the smaller 200watt element when drilling out the holes. See HERE

Here is copy of an email from a USA resident replacing 110v elements
Peter,
I appreciated your reply a couple weeks ago. I adapted another heating element to repair the brass La Pavoni high power element that burned out on my unit.
Here is the heating element I purchased:
http://www.1st-line.com/store/pc/Lelit-Heating-Element-1000W-110V-copper-172p3913.htm
I cut the original high power element out with a die grinder, drilled the brass plate, and then spot faced the area around the drilled holes on both sides of the brass plate to remove the brazing lumps. See photos:
https://www.bluecat-consulting.com/LaPavoni/DSC_1538.JPG
https://www.bluecat-consulting.com/LaPavoni/DSC_1540.JPG
I unwound the new heating element 1 full turn so that its inner diameter was large enough to fit around the original low power heating element. Here are two photos of the fitted heating element.
https://www.bluecat-consulting.com/LaPavoni/DSC_1546.JPG
https://www.bluecat-consulting.com/LaPavoni/DSC_1547.JPG
I fabricated a 0.015" thick round paper gasket and used some food safe silicon sealant between the flanges on the new heating element and the brass plate. I used jamb nuts on the outside of the plate to hold the new heating element to the brass plate.
It works well without any leaks and was far cheaper than buying an adaptor flange for the fine threaded boiler and buying a new stainless two element heater.
Happy coffee drinking to you!
I do not stock 110v element but if there is enough demand I will have them made - do contact me
I now have a quantity of crimp tags and boots matching the original ones used on all Pavonis. These are 6.3 x 0.8mm for up to 20AWG and a insulated cable diameter down to 2.6mm. They are a great design because there is a strain relief tag which can be crimped around the insulation of the wire as it enters connector. Another great feature is you don't have to remember to put the boot on first as it slides on after attachment to the wire - how many times have you forgotten to do that?....
No need for an expensive crimp tool. I feel these are far superior to the insulated types which are generally available.


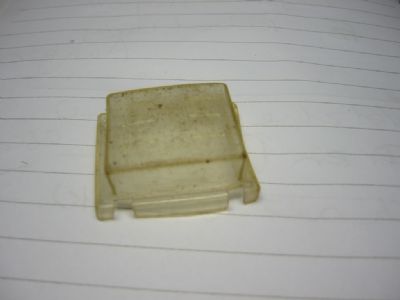
Found a replacement for rocker switch splash caps, they always turn a nasty brown with age and coffee?
Sometimes when replacing the old brass element bases the will not seat properly and leak, This appears to me to be due to excessive warpage of the base which cannot seal. The OEM gasket is no longer available from La Pavoni. I have a 2mm thickness gasket but sometimes this is not enough, either due to warpage of the bases or insufficient thread projecting past the base fixing ring. Whatever the reason the most simple fix is to use a thicker gasket.
Various iterations of circuits for the lever machine require different switches. See diagrams below Click on photo for larger copy

The original switch for the double element design 435059


Europiccola switch for Europiccola pressure-stat model with ready pilot light 435063

Switch for the Professional pressurestat model OEM Part No 435061. Diagram below
Pressure stat model wiring


Professional Model (with pressure-stat)

Non-pressure stat model wiring - 2 switch options


You will find in the above layouts that the neutral is switched, I have always felt it was the safest option to have the live go through the switch so if possible I always swap it from the factory set-up and recommend it to anyone doing any wiring work (by all means leave it as original if you prefer - it will work either way).
I also recommend the mains cable is replaced on older machines as it is largely overlooked and should be considered as a consumable item. Tip; always increase the length of earth (ground) wire in the mains lead with respect to the Live and Neutral wires so it will be the last wire to disconnect should the worst happen and the cable be pulled out of the cable grip. Personally I often also add an additional earth to the base for increased safety as the boiler ring where the earth is normally attached is often isolated from the base by the gaskets. One other thing is, in the UK the plug incorporates a 13amp fuse from the manufacturer, This is far too large for the machine and defeats the whole purpose of a fuse. A 5amp is far more suitable (1000watt element draws approx 4.5amps at 240v).
It is possible to reclaim a failed heating element , this is especially important for the double element type which are getting on for £100 in the UK (what a rip off!). First off check your static resistance readings


If you are getting open circuit it is burned out. Are you getting a reading but it will not stabilise, could be burned out. Move the scale to meg ohm and measure between terminal and the base plate/heater sheath. are you getting a reading ? If so it may be possible to reclaim it. If you getting a very low reading between the terminals and the base plate, sorry the element wire is shorting and is most likely not reclaimable. Now do a visual check of the element sheath to look for splits or pin holes.

Once you have identified the failed element(s) remove the the ceramic collars if they have not fallen off already. Scrape out the ceramic material (I use a metal DenTek tooth pick, and or a generic Dremmel tool), dry it out at 175 °C in a domestic oven for an hour or two. remove it and put your dinner in so as not to waste a hot oven, let the element cool while having your meal and then recheck. Are you get a reading above 10 MegOhm? (quite often infinity) If not try again by taking more material out of the end of the element. Time to seal up the ends of the element. I use epoxy putty but NOT the metal reinforced type for obvious reasons. Once that has set, recheck the reading and if good, reassemble and test preferably using a plug in type RCD if your house circuits are not fitted with them already (I use them all the time). If you can, get the machine once rebuilt PAT tested to make sure your repair is good (this is much better test because it applies 500 volts during the insulation resistance measurement). Please be very careful, there is obviously a shock hazard in doing this work.
I can offer a kit for £3.99 consisting of high temp putty, insulating varnish and PTFE split collars to replace the original ceramic up to four terminals

