 Our family Allotment. (Keeping Dad sane since 2011!) | sitemap | log in Our family Allotment. (Keeping Dad sane since 2011!) | sitemap | log in
|
 |
||
| This is a free Spanglefish 1 website. | ||
Welcome to the kids part of of our website! Gardening with children can be as simple or as complicated as we wish to make it. For the kids themselves, it can be not only an exciting adventure and experiment, but can also be a really good teaching tool and just gives LOADS of satisfaction - and kids love it, not least coz it is an acceptable way to play with dirt! Here are a few ideas to get the kids into the allotment/garden. 1) How to make a bird feeder. What you will need
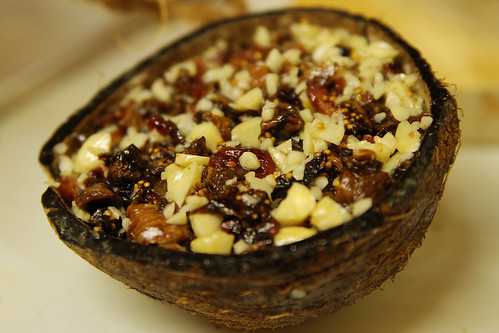
Step-by-step guide1 Get your children to weigh out an amount of suet and put it in a saucepan. Help them to melt it over a gentle heat. 2 Next they must weigh out an equal quantity of seed, adding in any extra ingredients they wish to include. 3 When the fat is liquid, turn off the heat. Help them to remove the pan from the cooker, and then stir in the seeds and other ingredients you have chosen. The mixture should look quite sticky as this is what holds the mixture together once it has cooled. Leave it to cool slightly. 4 They can tip it into the tin or the coconut shell, or into a heatproof dish if they are going to use an onion bag. Leave to cool and set completely. 5 When it is set, they need to string up the tin or shell, or wedge it into the branch of a tree in the garden. Place it somewhere they can see from inside your house. 6 Now they can keep an eye on their bird feeder and see what comes to eat the delicious seed cake. Remind them to make another cake when the first one is getting low! Tips and advice
2) How to make a balloon barometer As gardeners, what is happening with the weather is very important to us, because it can affect the plants we grow. If we know that bad weather is expected - a frost or high winds for example, we can take steps to protect some of our more tender plants. It is easy to make a barometer of your own to help forecast the weather - you might even be better at it than the weather bureau!You will need: an empty glass jar e.g. a coffee jar, a balloon, a strong rubber band, a drinking straw, a small piece of paper, scissors and sticky tape, Here's what you do:
1. Cut the neck off the balloon. 2. Remove the lid of the jar. Stretch the balloon tightly over the mouth of the jar. 3. Secure the balloon with the rubber band so that it forms a flat, air-tight seal on the jar. 4. Cut a small triangular piece of paper to form an arrow head for the straw. 5. Snip one end of the straw crossways to make a 1cm slit in each side. Slide the paper arrow head into the slits. 6. Place the other end of the straw at the centre of the covering of the jar formed by the balloon. Attach the straw to the balloon with a piece of sticky tape so that one end is at the centre of the jar and the other extends over the edge. 7. A sheltered spot outdoors e.g. a balcony is a good spot to put your barometer. 8. When the air pressure is HIGH it will push in on the balloon and the cover will be sucked inwards, forming a saucer shape. This will make the arrow point UP. This means fine weather is on the way - good for gardening but, at this time of year, if the air is still, there could be a frost.
Stone PaintingMaterials
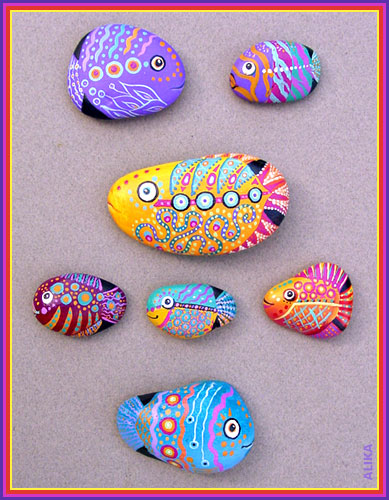
Directions Clean and dry off the stones. Mix the paints and pour them into paper cups or muffin baking pans. If you are using tube paints, squeeze a little onto a plastic plate. Have your child paint the rocks in sequence—while the paint on one stone is drying, apply paint to the next stone. Continue until all the stones are colored and dry. Add lines and other designs with the pens. Use the water in the jar to wipe off mistakes and to clean brushes. Painted stones can be used as paper weights or ornaments.
|   |
|
 | ||


